Planning a Semi-Sealed Night Light Part 4

Good Morning from my Robotics Lab! This is Shadow_8472, and today, I am printing a thin box frame the maximum size of my 3d Printer. Let’s get started.

Workflow wise, things were fairly straight forward, though in reality, things were overlapping, as usual. The workflow started with planning. I want a physical model of how big I am able to print. I toyed along the production line between Blender, Cura (the slicer), and the printer before settling for a squished “cube” that will scale to have 5mm edges and corners. A power outage during the night caused me to lose my model, but I was able to load my hollowed out cube again from a .stl file. Interestingly, it was converted to have triangular faces, so I had to turn it all back into quads before I could continue.

Meanwhile, my early cube prototypes’ rafts wouldn’t start out correctly. The extruder tip would start moving without the plastic sticking until a few inches down the line. This problem looks like the exact same one as when I printed 36 coins at once for the meetup with Tango a year ago. That time, I could just discard the malformed tokens, but this time, it’s a whole print depending on this line.

I’ve investigated the matter by learning enough G code to read the instructions the printer was following, and I get the idea it’s following them correctly. Link to a Wiki. I learned a bunch, but I literally don’t have anything to show for it this week. No cube, not even one on the printer. I’ve tested a number of theories, including retracted filament to goopy nosel. I’m out of time, but the first thing for next week is checking out the print bed, a factor I dismissed earlier on because of its resemblance to the coin problem earlier. I will say though, that I do have the bed a little lower than I have had it before, so that may be the case.

Another unsolved problem: Whenever the printer boots and I try printing the hollow cube, I’m finding the printer ratcheting when it tries going beyond its print range. I’ve had this happen a couple times, but it stabilizes after a couple false starts without me seemingly doing anything.

Final Question: Two: What’s with my delayed extrusion start? What’s with the printer glitching and self-correcting?

Planning a Semi-Sealed Night Light Part 3

Good Morning from my Robotics Lab! This is Shadow_8472, and today, I am prototyping the shape for this large night light project. Let’s get Started!

I made a lot of progress this week. We ordered a roll of white PLA plastic for this project, and since it worked out well with a free shipping deal, we also got an ABS spool for when I print up another Pi case sometime in the future when I have a setup that can safely handle the toxic fumes.

While the spools were shipping, I got into Blender, and fiddled around with merging two half-cylinders on top of a box. The shape is supposed to look kind of like a house with four windows. Modeling that up took the majority of my time, but that was review. Good thing I remembered enough to recognize or look up the names and shortcuts for each tool I used.

I printed up my first prototype, and it turned out about exactly as I imagined it, only the color was solid white instead of clearish white like the demo filament that came with the printer in the first place. I modeled up an interior, and it turned out exactly how I imagined the first one. When I saw the printer wasn’t doing it correctly, I applied my mirror modifier and tried connecting the inside layer and outside layer, but the same problem must have happened again, because when I opened up the slicer with the allegedly third design, it was the second, sealed design. Good to note it doesn’t just draw the outer most layer.

While the third one was printing, I decided to slip in a few “spare parts” that were otherwise rattling around in my laptop before replacing the power port. I paused the print and noted how I would need access to the back of the printer when I install the electronics for the final light. Another minor mystery I’ve been dealing with was specks of other colors showing up in prints. While shopping for the filament, we actually spotted a spool for cleaning the printer. I don’t know how it works, but I could see the demand for such a product if someone wants to make sure if there isn’t contamination between colors or types of plastic.

I’ve used what I’ve learned to refine my understanding of this project:

Prototype shape
Hollow Prototype (present)
Model up relief pictures on “windows”
Deduce Final size
Electronics to fit final size
Refine model to hold electronics
Final product

In the interest of keeping specks of black or red out of my final print, I think I want to make a print to demonstrate the full print range of the printer. I’m thinking of doing a simple cube with just the edges. It will produce a lot of infill, but I think it will be neat to just have a cube around.

Final Question: What fun shapes would you like to see available for print for tiny computers?

A Series of Limitations

Good Morning from my Robotics Lab! This is Shadow_8472, and today, I am laying a project to rest. Let’s get started.

The past couple weeks, I’ve been working to make a video call from my Raspberry Pi using the PiCamera taped into the case. Only this week did I learn it was too ambitious when I stopped by the workshop and actually started testing what worked. I managed to get a inbound stream, and presumably good audio (there weren’t any speakers connected at the time), but the video stream coming from the Discord webapp in Chromium came through way too slowly to be of any use but for a good laugh.

My time on this project was not wasted, though. I learned a lot about both how the PiCamera works and what it can do and what the Pi itself cannot do. It turns out the Raspberry Pi has all its graphics on the CPU, meaning no specialized circuitry for videos to begin with. That isn’t to say it cannot handle ANY streaming. It did manage to pull off viewing the live broadcast of my church’s services for the last couple Sabbaths with only a few problems. It’s likely something to do with the resolution and frame rate it’s trying to work through. That or trying to send non-existent audio while streaming video is a little much for the little computer.

This project was fun, but I simply don’t have the skills to pull it off at this time. If I ever do get it working, I expect it to be on a tiny, 64 bit OS for the Pi written just for video chat and nothing else.

On an unrelated note, I plan on separating the Pi itself from the cat deterrent(s). It will hopefully solve the power problems if I set up a little, offline network connected by radio or WiFi. Maybe I’ll take apart an old wireless mouse and see if I can use that.

Final Question: If you want to stretch your abilities, you should pick goals just outside of your abilities. What was the last project you tried, but found was just a little bit too far out of your reach?

A New Tool Part 12

Good morning from my Robotics Lab! This is Shadow_8472, and today, I am finally done with the paint job. Let’s get started!

I had to give in. Spray paints are just too broad of strokes for the delicate eyes. I ended up recruiting my sister to do them with acrylics. On the plus side, they are a slightly closer shade of blue to the original sprites, which I was going for, anyway. I booted up the Pi after the final bits of paint were dry, and confirmed a clear image from the camera. I snagged My father to clean the whole thing with rubbing alcohol and the two of us applied a clear coat.

As of this writing, I have spent an hour or two working at removing that Elmer’s glue mask. I waited too long, and the mask is too thin. If I ever need to mask off another waffle cone like that again, I’ll spend less time using masking tape beforehand than peeling the glue afterword. The Elmer’s glue trick is only for small details!

The paint job is not as perfect as I’d hoped. The white iris has a little bit of blue in it and there’s a little chip in the paint on the back. A bubble or three have grown in a few places about the surface, and the final irises have brush strokes. Even with all these small flaws, it still looks better finished than it did while stuck in development limbo. Overall, I’d say it’s almost what I wanted.

As it stands now, I have most of the glue off, but the rest is either splitting on me or stubbornly sticking to the printed plastic. Fortunately, the holes I taped off remained taped off through the whole ordeal so I didn’t have to go through and find a hook to get blobs of glue out of all the deep crevices.

Looking forward, I hope I don’t need to use an Internet connection to recognize a cat. I honestly don’t know how long it will take to finish with the software side of things, but I will need to first make a “Hello World” program to debug my coding setup. Come to think of it, I likely only have one more “A New Tool” post, as it’s just going to be attaching the board and any little details that pop up.

Final Question: have you ever had a long project finally approach its completion date after crawling along for way too long?

Minecraft Boat Race Port Part 3

Good Morning from my Robotics lab! This is Shadow_8472, and today, I am bringing you another short chapter in the history of my port project. Let’s get started.

Work is still slow. I have a fairly solid idea of what the structure of the final product is supposed to be, but it’s coming along. Jam and I weren’t exactly able to work on it constantly, but he did help me with a few ideas and get the teleport command for entering the level.

I really hope I can do a demo for next week encompassing the original experience for the boat race. In the meantime, I can finish fine tuning what I have and showing my progress off and comparing it to the last time I showed it off to someone. Early on, I showed it off to my self, playing the levels just for old memories’ sake. That was just the levels loaded into a field after aligning them correctly. Later, I had a friend over where I loaded each level half in manually. After that, I demonstrated how I only needed to load one half, and it would load the other automatically. Another step toward completion let me show someone else how I had the structure blocks correctly placed to load the five available levels. This week, I provided my mother with an experience one step closer to completion when I played interface between the pressure plate and loading the level; the level now teleports its players to its own starting point.

Right now, I can think of two remaining challenges: I need to do the interface between pressure plate and level loading, and I still need to do the level end functions. Other than that, I still haven’t even looked at the original celebration commands.

Final Question: The teleport command came to me after goofing off all day. Have you ever gotten a critical idea in a similar fashion?

lootRepair0.3

Good Morning from my Robotics Lab! This is Shadow_8472 and today, I am reviewing my progress on the lootRepair program from my previous two posts. Let’s get started.

I started this iteration of the program with a major paradigm shift. My first two attempts at the program could be modeled as following a coded track. I gave up when I had trouble tracking down too many bugs when I tried to break my second attempt.

My new version has two phases in its main loop: a getState phase, and an action phase. The getState phase takes a look at the turtle’s state, and the action phase acts on that phase, handling the upstream redstone output, weather or not to wait on an event, and there’s even a spot where I can put extra code; all of which were previously handled with multiple instances of redundant code, each copy of which had to be visited when a change was made to one of them. I think of it as a state machine, but I’m not exactly sure if that’s the proper name for it. Whatever the case, the debugged product should be able to handle me giving it more abuse with less patchwork.

Building up the code to check for a crafting table took four attempts before I came up with a version that wasn’t too ugly to follow, and then one still needs to know what they’re looking at. Early startup() attempts were based on “use the correct tool, turtle.getItemDetail(n)[“name”], and baby its weak spot, (possible crash from a nil return)” ideas, so I ended up using the slightly slower, but more ingenuitive approach, try to equip each item in the turtle’s inventory and see if it can craft if something equips. Keep track of if and where a workable slot is found, and try the other equipped slot. (There’s a bug where crafty turtles forget their crafting benches, but they work after unequipping and reequipping them.)

As of right now, I still need to finish debugging it. When I transferred my Notepad++ generated document and stuffed it in the ComputerCraft folder where executable programs are stored, I got a bunch of errors and wide gaps where lines of code should be, or more likely, they are some other character interpreted as a line feed. After all, the CC editor doesn’t use proper tabs, maybe something else is messed up.

I’ve been editing the original program in parallel as I debug the in-game version. It’s a little redundant, but I really want to publish this some time here, hopefully next week… if I don’t take a break and blog about something else.

Final Question: Do you know a lot about ComputerCraft? Why is the turtle glitching its crafting table away on chunk reload?

Construction of the 3D Printer Case Part III

Good Morning from my Robotics Lab! This is Shadow_8472, and today, I am finishing my 3D printer’s case. Let’s get started.

Last week, I printed the brackets, and oh, did that thing drone on and on. I’m not looking to print anything else for now, so I finally unloaded the filament and put it away. PLA filament is supposed to be stored in an airtight container, and I am fortunate a gallon Ziploc bag can barely swallow it. One tip I heard when first researching 3D printing before setting the printer up: on the side of the spool, there is a place to feed the filament so it doesn’t tangle while in storage.

Besides the brackets, my father and I are using some cheap wood for the frame and some spare Masonite panels for the siding. The door is being made of an acrylic sheet. Instead of hinges, I’m planning of making it slide out the top.

Construction this time has been much more straightforward than previously. We used a skill saw to cut three six foot pieces of 3/4 in lumber down to size… “Measure twice, cut once.” Good thing we bought extra for stock. Of course, after sending the ‘finished’ pieces back out for a round of quality control on the skill saw, we assembled the frame with the stunted, vertical edges. Those got swapped out after inspection. Had they gone unnoticed, the filament spool would have required accommodation through the roof, defeating the whole point of the project; to keep the cats off the printer.

As stated before, the side panels are fashioned from some Masonite we had occupying garage space. We cut a couple of pieces to form the back, sides, and top of the case. The side and back panels do not reach all the way down. The gap provides access to the power chord, switch, and various ports on the side. The bottom panel is absent; if anything bumps the case, it is isolated from the printer and won’t transfer the shock as readily. The top corners are cut to facilitate ventilation and dodge the corner brackets. The front panel, will be different. My father and I have run out of time this week, but the current plan is to make a panel to slide out the top instead of a hinged door.

Over the course of this project, the materials at hand have not always lent themselves to the exact plan. The hardware store didn’t have appropriate corner brackets, so I ended up printing them. The calculations for the wood for the frame were actually made with the assumption of eight foot pieces, they came in six. It’s only when you look for hinges that you realize just how many choices there are and how many won’t work for you. Roughly nothing about this case is untouched by design revisions.

Final Question: What projects have you adjusted for available materials?

Goal Checklist

Good Morning from my Robotics Lab! This is Shadow_8472, and today, I am reviewing my goals leading up to development on a robot. Let’s get started.

So far, I have a Linux machine running. That’s about it. OK, I setup a pair of  MineCraft server programs on it, and all those activities built up my skills, but now, the path forward seems a bit less linear. I’ll try to explain each skill I think I’ll need and a possible project to accompany it.

The next project I want to do is set up another Linux MineCraft server, but this time, I want to remote in and use another computer to control it.

At some point, I think at some point, I will need to look into 3D Modeling. The skill to program a shape into a virtual environment is a valuable skill with many downstream applications, like animation, renders, and 3D Printing, among others. I have a minimal amount of experience with Blender, and I hear it’s fairly well supported across many platforms and for about any job. Plus, it’s free and open-source nature fit the secondary themes I’m trying to work with. The only thing I can think of to do in terms of learning it is to find a tutorial and follow it, pure and simple.

Gazebo and ROS are programs I will need. But before I can go there, I will want to get my main tower properly dual booted. Before I can feel comfortable doing that, I want to set up Linux a few more times AND a get a regular backup going for my computer. Once those are in place, I can start toying around with a virtual robot in Gazebo with ROS before moving up to physical robots.

Manufacturing the bot is something I’m looking forward to, but it’s going to feel like grunt work to me. I want to get on to programming it, but not so fast as to be completely oblivious as to how to do it when I get there. That said, I realized I will need to develop skills in following schematics when I spotted a post on the site for my intended model last week (LINK).

Even after I get a little proficiency in those skills, I can see myself having to go through a prototype or two before I work up to a social robot I’ll be satisfied with. I feel like I should practice setting up a dual boot system before converting my main system. Final Question: What kind of things would you want to see in a finished, open-source social robot?

First Project Complete

Good Morning from my robotics lab. This is Shadow_8472 and today, I am explaining why I am not upgrading my computer this week. Let’s get started.

Long story short, California was set ablaze last week.  Our neighborhood saw a glow from the fire burning the next city over. We packed all our most important possessions, like a 100+ year old trunk of photos and my desktop computer.

The Internet dropped out for a day or two and our gas got nixed so it wouldn’t make a flamethrower if the neighborhood burned down. We still had power, and our stove and new drier are electric, so we only really missed our hot water. We tuned in to the local radio station for live coverage.

The station itself was in a badly burned section of town, almost having been burned down themselves. They were ultimately spared, but they did say something about an exploding tree shooting an ember the size of a large fist into their back parking lot.

The stereo we were listening on is almost as old as audio CDs. Fun fact about radio technology: when you are barely getting a station, it gets fuzzy with static. Repositioning the antenna is a minor mitigation, but it doesn’t help when your position in the room can interfere with incoming radio waves, even if you are just sitting up.

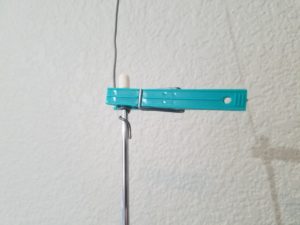
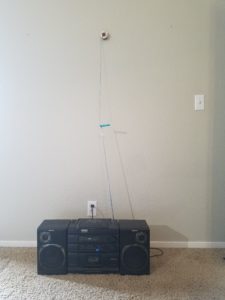
I eventually got tired of the static and tried to fix it. The sliders on the front helped, but not enough. Touching the antenna seemed stabilized the signal almost perfectly, but no one seemed interested in standing there with an arm on the thing.

Eventuality, in true MacGyver style, I raided the tool chest and grabbed the first metalic spool of wire I saw, in this case, some sodder for stained glass.

I ended up using a plastic clothes pin to affix the makeshift antenna extension. I later improved my design by curling the sodder around the tip of the antenna to prevent the connection from slipping down. Since then, the radio only complained when adjusting the spool, which was hung up on the wall.

In closing, the fires are still burning, but the firefighters are getting them under control; it looks like my neighborhood was spared. I haven’t seen any national coverage, but locally, the news has been positive in the face of the disaster. Sure there were some looters going through evacuation zones, and people are still trying not to breathe the airborne remnants of other’s houses, but the impression I got is that people as a whole are getting together to help each other.

In the future, I am sure there will be times I am at a lack of overall progress due to one delay or another. What do you think about unplanned mini-side projects?

Early Progress

Good Morning from my robotics lab! This is Shadow_8472, and today, I’m going over my progress so far. Let’s get started.

Now that I’ve written about getting the site up and a few vague goals, I want to explore some relevant research I did before I went off to start blogging about said research.

ROS. That is about the first, term you should hear when first looking into hobby level robotics. ROS (Robot Operating System) is, surprisingly, not quite a OS (Operating System) for robots. My understanding is that it’s more like a program that manages robot parts. It’s free, open source, and used at all levels of robotics, including some commercial products. Just don’t use it for something that absolutely must not get hacked or someone could die. Security, I hear, was more of an after thought.

Linux is the more familiar name for the do-it-yourself type of computer OS. Personally, I’ve used Windows since I first taught myself Chess on Windows95. Guess which OS ROS runs on. Answer: Linux. Guess what my second major goal for this project is going to be. (Tip: the first goal was my first post.) Answer: Install Linux and learn more about it. Now, I’ve had some minimal exposure to Linux at both my high school and university (both used Windows primarily). I’m not a “What’s Linux?” type of guy, but I’m no alien to it either.

Gazebo is another program I read about related to ROS. It’s some sort of robot simulator. I don’t know much about it, except It primarily runs on Linux, and that you better know what you are doing if you dare set it up on any other OS *Windows*. I think it prefers to run in Ubuntu, but I’ll check that out later.

Anyway, since Linux keeps popping up everywhere I look during my preliminary investigations, I figured I’m not going to have a good time if I try to get anywhere without it. I set out to install Linux on my desktop; my SSD was full, even after relocating a sizable file and picture archive. Somewhere on Gazebo’s site, they recommended against just running Linux off a flash drive, which would have been my next investigated solution. I finally caved and bought a new SSD to install so I can dual boot my machine. It was about that time I decided to start this little blog sidequest. Besides, the more I learn, the more ambition this project goal seems, and I can use all the help I can get.

That pretty much brings you up to date with my research so far. As of this posting, I have not installed the drive. That’s in next week’s topic. I plan on uploading a video where I perform the upgrade.

Final question: While my ultimate goal is to assemble the software side of things for free, paid stuff still might be beneficial to look at. (Think, “They did it, now can I?”) What software should I look into?