

Good Morning from my Robotics Lab! This is Shadow_8472, and today, I’ve finally completed the construction of my New Tool!
I believe it’s only appropriate that I write this post on the computer in question, a little Pac-Man themed Raspberry Pi system I’ve named Blinky Pie.
The work this week was actually fairly simple. I stopped by a local hardware store with the Pi and the case to pick up two screws, and the guy who helped me was very knowledgeable. He helped me choose screws that were big enough to hold the board, but not so big as to crack the printed plastic.
Before I did my final assembly, I did a dry run where I taped the camera in place across the top of the dome and down the other side, and it worked pretty well, so well, I only had to add a final piece to keep the camera secured.
I took the camera out to finally install the two heat sinks that came with my Raspberry Pi starter kit, a task my father was happy to help with. After that, I installed its ribbon cable around the back of the board where I could install it with the screws I picked up earlier after making sure the camera was installed correctly. Of note, I have been having a lower rate of failure when installing that thing lately.
While celebrating the final completion of the base hardware for my tool, I ended up exploring some settings on the GUI, specifically the task bar, or as Windows would call it, the Start bar. I found a setting to customise the color, and about a setting for about everything you could think of and double it. The term is called “decision fatigue.” There are so many settings, you can spend, and have to spend an hour or two to get everything looking OCD compliant. One glitch preventing using the “icons only” setting from save space has a workaround of moving the task bar to a side and back again, but that throws a bunch of other settings into chaos, mainly the height of the task bar, and guess who doesn’t have a “restore to defaults” button!
I’ve run multiple tests with the Pi idling in the case before its final installation. I’m pretty confident the case won’t melt. It’s well ventilated by the heat-sinkable chips. I even ran the dry assembly for a few hours, and the plastic around the stock board with out heat sinks was only warm.
Final Question: Besides feline repellent, what other applications can you think of for a Raspberry Pi with a camera?
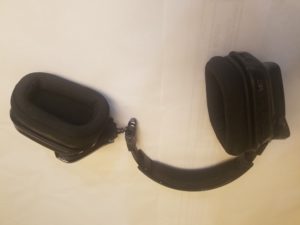 I’ve had this set of headphones for a while now, and I’m not always the most careful with my technology. I often leave them on top of my cluttered desk or computer tower, and the household cats often pilgrimage to the window behind my desk. Be it from my cat or my klutz, the headphones often would wind up falling to the floor, and I would count my blessing when they still worked each time they tumbled.
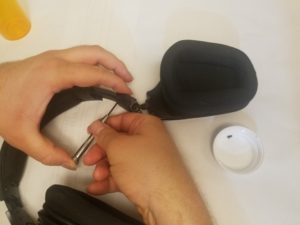 I started by removing the four… three of the screws holding what was left of the wayward side together. The forth one was a little stubborn, but it eventually came out. The piece itself had a little more resistance, so my father and I coaxed it out gently.
 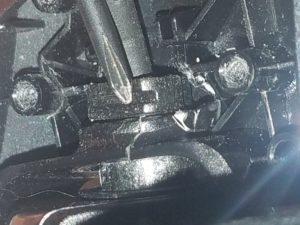 Exploring the inside was a little disappointing. The first sign this wouldn’t be a successful mission was the tweaked, plastic fingers meant to hold onto a grooved peg (helpful for) earpiece rotation. Additional bad news came when I spotted an actual crack in one of the brackets.
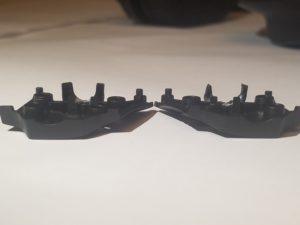 For the purposes of the blog, I decided to pull the other piece off for comparison. Remember all those drops? The teeth on the “good” removed piece were well on their way to deforming in the exact same way. The backpack getting crushed must have affected only the one side and was either enough to finish the job or do it from scratch.