A Spot of Network Maintenance

Good Morning from my Robotics Lab! This is Shadow_8472, and today, I am scratching around for something to talk about and I’ve come up with reviewing a home network crash this week. Let’s get started.

Years ago, I was staying in the dorm at my university as a Freshman. The walls were concrete, so they didn’t have the campus WiFi installed. If you wanted your own WiFi, there was a hard rule: “Absolutely no routers” because it messes with the network. Instead they had these wireless access available from IS (Information Services, the local version of IT). Each room had two Ethernet ports (and two disconnected phone connections thrown in for free), and even though I was alone in the room, I had my desktop, laptop, and now an access point. Hard wire is much better than the unreliable WiFi, so I ended up picking up this Ethernet switch.

An Ethernet switch is a step above an Ethernet hub, which was also allowed. While a hub just repeats each signal it gets to all the other connections, and the wrong connections ignore them, a switch directs signals to where they actually need to go. I ended up with an eight way switch.

My switch served for the next few years and eventually got integrated into my family’s home network system, where it’s been serving with all but one connection for a while. This week, the Internet cut out on us, all devices at once. My father was the one who actually talked to tech support, but after they told him his router was bad, he did some additional diagnostics, which pointed to my switch having failed.

My mother and I went to buy the replacement the next morning, and I was a bit perplexed when I opened the box. The old one was simple: plug and play. This new one comes with a CD, and an instruction guide for setup that doesn’t even work straight away with Linux. At this point, I’m getting conflicting impressions: Linux is king in the server world and prominent with people who are into computers, but they only seem interested in catering to Windows users.

I ended up ignoring the fancy setup for now and tried plug and play. It works. I cannot imagine why they would not list that as an option. It would have been a bit less frustrating if they had just said so right away and stated their extra software as “optional, for enhanced performance” or something like that.

Update: As I was finishing, the Internet dropped out again. After it’s stable again, I may want to take another look at my switch to see if it was working all along. In the meantime, a router reboot fixed it for now.

Final Question: What was the last piece of computer hardware you wore out?

MineCraft 1.13 Cave Spider Farm Design

Good Morning from my Robotics Lab! This is Shadow_8472, and today, I am taking a break from the regular content on my blog and doing a tutorial on this easy Cave Spider XP farm I’ve developed with a little help. More on that later. Let’s get started!


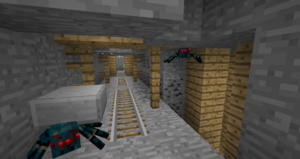
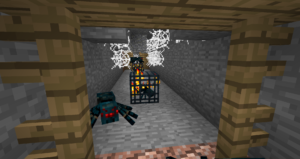
Minecraft has a small zoo’s worth of farmable mobs, but one of the most challenging is the Cave Spider. With its ability to climb any surface as if it were covered with ladders and its tiny hit box, able to slink through all but the most airtight of hastily built walls, these pests are native to abandoned mineshafts, and nowhere else. The only reason anyone might even consider a Cave Spider XP farm is because of how often multiple spawners can generate close to one another.

.
This tutorial assumes you’ve already found an abandoned mine shaft full of cave spider spawners. Once you have a bunch of spawners captured, write down or take screen shots of each spawner’s coordinates. Remember, mob spawners only activate if you are within 16 blocks, so the farthest apart two spawner blocks can be is 32. If you aren’t sure if two blocks are in range, use the Pythagorean Theorem generalized for three dimensions, √[(x1-x2)²+(y1-y2)²+(z1-z2)²].


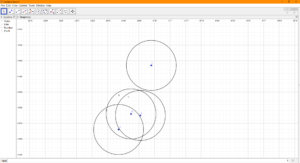
If you are looking to develop more than two spawners, which is usually the case if you are going to go for cave spiders, you’ll want to actually graph their x and z coordinates to filter out the false hopes a purely Pythagorean approach can yield. I recommend using a Geometry program like GeoGebra. Draw a 16 block radius around each spawner’s point and look for overlap. Once again, this won’t give you any hard positive results, but it will give you a fairly good idea of what to expect and how big your spawners’ overlap area is so you can start designing your grinding room.

You’re mostly on your own for the next part, since there is a plethora of possible arrangements between spawners, collection systems, and collection points, but I can give a few general tips.
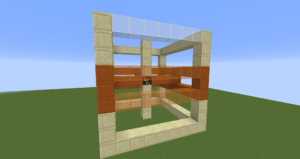
Spawners won’t spawn mobs if too many are within a 9x9x9 box of the spawner block, centered on the exact middle of the spawner block. For maximum efficiency, drop your spiders down four blocks, then at least another two and into a water collection system.


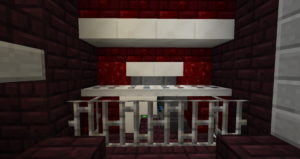
Cave Spiders’ alleged super powers end when they can’t stick to ceilings. We can exploit this by using Iron Bars, Glass Panes, or the like to make a little overhang they can’t climb past. (From here on, whenever I say, “Iron Bars,” just use the narrow block of your choice.) To keep them from climbing into a corner and building up, we can use flowing water at the top to push them off the wall.


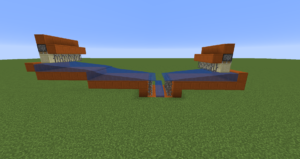
Here’s a cross section of my personal collection system. Important notes include highest part of the floor (the system need not be perfectly symmetric) is 4+2 blocks below any spawner above it, There are no water source blocks in the collection area itself, and the final water flow ends on the Iron Bars. Build the middle of the trough similarly, digging down whenever you run out of water instead of adding sources. The pistons are for a gimmicky lighting system I only recommend for those brave enough to deal with lava lighting.


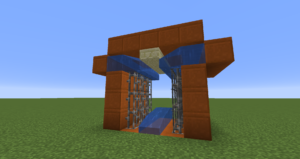
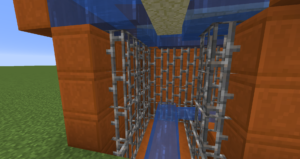
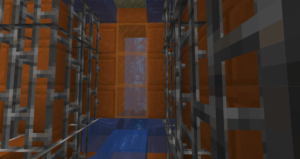
My main innovation for this tutorial was this part right here. By lining the top of the transportation tunnels with top slabs (Trapdoors/Iron Trapdoors should also work and look nice), we don’t have to dig out so far to get that little tip of water to push the cave spiders back; a source and single flowing water should do. Once you are in the tunnel, feel free to use water sources whenever you drop the floor.


When you get to a corner, drop the waterline again and add a source block. On the upper “water rim,” be sure to use an upper slab so the spiders don’t get stuck on a quarter of an exposed block. Just carry the inner corner around the turn, but be sure you don’t accidently turn your flowing water into two lines of source blocks.


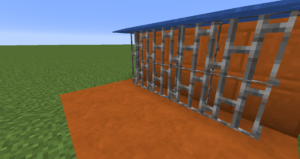
Here’s a picture of a Cave Spider grinder design from SteelToad, a colleague of mine from the server I play on. The Spider input is two wide, so I like to put a two wide soul sand bubble elevator in line with it and pipe them directly to the kill chamber.


Back in the plumbing, the entrance of the elevator is only a block wide. Unfortunately, we’ll need to use a pressure plate or sign to contain the elevator water and rely on the spiders pushing against each other to move things along. While we’re at it, we can lose the bars by adding water streams from the sides to guide the cave spiders into where they belong.

A final note: If you plan on any serious AFK time, be sure to include an auto killer switch. When I built this in survival, I used pistons to change the direction the elevator sent the spiders. Other than that, add whatever you want in a Cave Spider farm. Just don’t get too close to the spiders when whacking at them, as they can still occasionally bite.

Final Question: What other design improvements would you add?

A New Tool Part 10

Good Morning from my Robotics Lab! This is Shadow_8472, and today, I am covering the finishing touches of the physical side of my new prototyping assistant. Let’s get Started!

I left off with the glue mask drying on the ghost’s foot area. When I peeled off the tape from around the stuff I actually wanted to paint, I ended up pulling bits of the glue mask off along with it. I ended up spending the week touching up the glue and waiting to paint the foot.

The lower half of the Pi case finally did get painted, but at present, I am waiting to put a clear coat on the whole thing. Order of operation keeps getting in my way, though, as the upper half of the case needs some touch up paint from where I goofed on the original masking.

In other news, I went to that workshop again. I hooked up the camera to the Pi and had it look through the pinhole. I was expecting a blue haze around the picture’s outer rim, but somewhere in the process of painting, likely when I was first painting the blue pupil and I stuck a pin in it, I must have expanded the hole just enough so it doesn’t show.

To finish this week’s project (late) I just need the touchup finished with a paint brush, a light sanding to remove the strokes, and a clear coat to protect the paint. After that, the foot’s masking can come off and I can mount the Pi board and tape the camera in place. As the file I printed up is meant for a slightly different board, I will only be able to use two of the four screw holes that align at once. I’m slightly worried about too much torque on the Pi’s circuit board, but if I’m always careful, it shouldn’t be a problem.

Final Question: I’m slightly worried I won’t have enough to write about when I get around to programming the thing. Will you be up to more technobabble style posts when they come?

A New Tool Part 9

Good Morning from my Robotics Lab! This is Shadow_8472, and today, I am bringing another slow progress report. Let’s get started!

In retrospect, I spent a little more time on my project than I would likely have given myself credit for. Nevertheless, I didn’t make my goal of fully painting the case. I had to plan every step before hand, and carry them through.

Early on in the week, I once again sacrificed the texture of my fingertips as I sanded the Pi case. When I sanded the pyramid, aside from only doing half of it, I had the sandpaper flat. Flat sandpaper doesn’t work so well with curved surfaces unless you have some sort of machine to sand evenly. I’m working by hand, without any power equipment. I used different grits, mainly skipping some of the lower ones and working with something a little more appropriate to the quality it’s already on.

The 660 piece I used up was the only one in stock, so I ended up getting and using 1000 grit for polishing it. I will say, though, it wasn’t the surface without blemish I was expecting. I kept getting these rings as if the vertical layers were slightly scaled wrong.

My technique while sanding evolved as I worked. At first, I was just trying to conform the paper to the surface to sand. After a while of mildly frustratingly flimsy sandpaper slowing me down, I folded it over and focused on smaller spots at a time. Later still, my father got in there and gave me a wash cloth to use as a flexible sander block.

After sanding came masking. Now, I have two pieces. The head, and the body. The head is basically a dome with eyes, one of which I hollowed out for the camera. The body houses the Pi and has screw holes on mini shelves and ventilation holes stuffed into a waffle cone “foot” section. After an overnight test on the test pyramid, I painted the eyes first. I got out the blue painters’ tape and covered the whole outside of the head. Then I took a razor blade and cut out the pupils, scratching the lens pupil in the process. Oh well. After spraying that blue, I found a tip online to use some Elmer’s school glue as a mask. I covered the pupils in glue and uncovered the rest of the eyes before the glue finished drying. When I peeled back the glue, I realized this project might not look absolutely perfect, but it’s going to be far from ugly. I missed a few tiny spots with the glue, and still have to do a little cleanup. As it stands now, I have two coats of red paint on the main dome.

The foot is another interesting story. I decided early on I wanted to leave the inside of the case alone. I also added the uneven underside to the immunity. Since glue gets into annoying, little places, I went with that to mask off the inside of the case and the bottom of the foot. However, the inside of the case has some spots I doubt I will ever be able to clean, such as screw holes. So I covered the little holes on the inside, masked off the parts I wanted covered, and applied glue as the positive mask; this is where it stands now, waiting for the globs of glue I used to finish drying. Once that’s done, I will remove the negative mask and paint the lower half. With any luck, I will just have to get the glue out and install the hardware and I will have a tiny prototyping assistant for many projects to come.

Final Question: With any luck, I will be working on the software side by the end of next week, but I still don’t have a way to physically make the high frequency to repulse naughty cats. What would be a good place to look?

A New Tool Part 8

Good Morning from my Robotics Lab! This is Shadow_8472, and today, I am taking a little side quest to try out some techniques so I can paint my Raspberry Pi case and have it look good. Let’s get Started.

I decided to paint one or more of my old test prints. The first two were an acrylic paint straight onto the plastic. It didn’t work all that well. I couldn’t even get a small piece devoid of any brush strokes, and I want a smooth finish. On top of that, I was able to easily scrape off part of the paint with my finger nail after it was fully dry.

My next step took the rest of the time for the week. I moved over to a goal of spray painting, so I printed up another pyramid from when I tried to figure out if the percent completed was in terms of time, z axis, or plastic used.

I was thinking of testing both sanded and unsanded surfaces, so I was going to print it twice, but I cut back and only sanded half of it. I still have the original around, but I wanted to leave that one alone as sort of a memory piece. Printing it again reminded me of how difficult the raft was to get off.

After getting most of the raft off, I got out the sandpaper, going through grits of 80, 150, 220, 320, and 600, using water for the fine grits on “waterproof” paper, and I actually got it pretty smooth. I did get the stubborn part of the raft off. After going back and forth on what part of the model to mask off first, I decided on using some blue painters’ tape to mask off the very top and dangling the whole thing off that. I applied two layers of white spray paint, including the bottom (primer included in paint). I let it sit for a day over Sabbath. After it had the recommended 24 hours to dry, I masked off the rest of the pyramid body and painted the capstone yellow.

As I peeled back the masking, I saw a few spots where I didn’t make sure the tape was perfectly creased in there and it leaked in. Lesson learned: use your thumbnail ensure the quality of your masking.

In the end, I like the smoother sides. The little ridges from printing poke out a little, and I’m not sure if they are catching dirt or wearing through, but I think it may be worth it to put the bit of extra effort to make the final product just that much better.

Final Question: I’ve been thinking of including a sub-title for multi-part projects. This one would have been something like: “(Side Quest: Painting Skills)”, but that makes it harder to just edit the URL to jump to adjacent posts. I know I don’t likely have enough regular readers to warrant this question, but should I include subtitles?