

Good Morning from my Robotics Lab! This is Shadow_8472, and today, I am playing around with my 3D printer a little more. Let’s get started.
So, I’ve been watching Tango Tek, a Youtube personality [Link to his YouTube], off and on for a few years now. I’m currently a member of his Patreon MineCraft server and there’s a meet n greet for his patrons coming up (already past as of posting). I wanted to make a little something to give him, so I started with pocking about in Blender and turned Tango’s logo into a neat, little coin.
The 3D model is fairly simple. I took a short cylinder and carved the double T into a flattened sphere. I then overlapped the two, selected both pieces, and exported to .stl.
I found an acceptable use for the fast print. For my first coin I sized the print at 1 in. diameter. It didn’t look the greatest; but I figured that was because the printer doesn’t have the finest resolution on the layer thickness, and a 3 inch one I wanted to make would be fine.
Wrong.
The big one suffered from the same aesthetic problems. I ended up going back to Blender and reworking the cutout sphere. Stretching it into a more pronounced dome, I exported again.
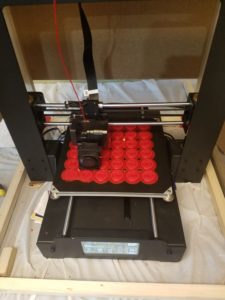 I did a pair of test prints and decided the 1 in. coins would be neat to hand out to everyone at the meet and greet, so at present, I’m printing up 36 of them at once. The raft is finishing up, but there are two spots where I think the coins will be lost. The first little bit of the raft just didn’t stick in that area. If those were solo prints, I’d abort them, but I’m not going to do so at the cost of the others.
I did what I could and cut away the bumps where the raft didn’t stick correctly. I had to work on the raft while the printer head was in motion (the left and right axis) because the pause feature parked the extruder head right above the damaged sections without a chance to get under them. Update: another layer on the raft brought the bumps back. With the bed moving this layer, I can only hope the defect doesn’t cost the other coins.
***
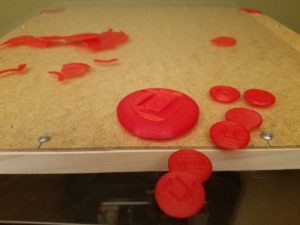
The printer finished after going all night and into the next afternoon. Three of the coins didn’t turn out well enough to give away. One didn’t even come off the raft at all. It turns out I was rushed in setting up the print. The close, left corner was aligned too low. That’s why the first layer of the raft didn’t stick. But in failure, I learned a little more about the structure of the raft. The outlines serve as a base for the first layer and so on and so forth until you get to the product.
As an extra little stunt, I’m making an extra, 3 in. coin along with a few smaller coins to replace the goofed ones and bring my total good coin count to about 40.
***
 My stunt failed. I think the way I modeled it is to blame. The middle detail between the relief peeled. One of the eight smaller coins didn’t peel from the raft. In the end, I’m taking 42 coins to pass out.
***
I don’t have time to remodel. As a last ditch effort to make a bigger one for Tango, I’m printing up three 1.5 in. coins. *** Nope, they didn’t work. The printer switched to a short infill based layer to finish the dome. That’s why all my big ones and the very first prototype were goofs. Other than that, I would rather both T’s be of equal depth. Something must have gone accidentally right half way when modeling these.
***
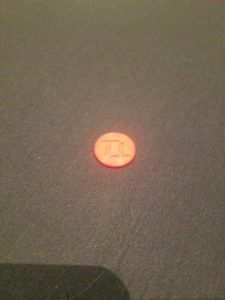 The Tango Tokens were a hit. Even though they weren’t perfect, they made for a cool, little souvenir for everyone. If I ever make more, I will want to remodel the coin and fuse all the pieces before they leave Blender. The printer was printing an internal membrane which led to the weak spot. On the other hand, maybe I can label future tokens with the event meetup. When I hold pretty much any 3D printed object to the light, I can see the infill lines. I want to try inserting a label in there to differentiate the production runs.
Final Question: have you ever made custom party favors, if so, what? And what for?